UNIT 4 - AO2 (2/3) - Scanning done right.
- May 18, 2016
- 3 min read

When it came to scanning my self-developed work, I would lay the negative strip onto a regular flat-bed scanner, with a clear sheet of acrylic on top of the strip to keep it flat and sharp, the image above is an sample from the method I've just described. Although this may have given me the best image quality at the time, there were bugs and issues that came as a result.
Firstly the negatives almost always came out blurry in some way or another, because medium format has a habit in curling easily it made it incredibly difficult to achieve a sharp image. It didn't help with the fact that the flat-bed doesn't have a backlight which meant the dynamic range of the negative I've just scanned was incredibly poor for what the negative can really achieve. This is just talking about Medium Format alone, trying to scan 35mm with this method produces even worse image quality due to the size of the negative so I don't even bother with that as it just intensifies all of the negatives I've mentioned in this paragraph.
However, I've decided that I'd like to explore Medium format further and to be able to appreciate the image quality more. To do this I've recently acquired an Epson V550 flat-bed scanner, it has holders for 35mm, 120 and slide film as well as a backlight to increase the overall dynamic range of the scans.
To scan the negatives with the new scanner, I have to crack the holder open and slide the negative in the sleeve facing towards the scanner. Once I've done that I can slot the holder in place and open the scanning application and choose my settings. It automatically crops out each of the negatives as well as invert and correct exposure settings so the image comes out the correct way. For my 120 images I choose a DPI resolution of around 1800 as the file sizes start to become excessive for what I'm using them for.
To show you a comparison in terms of image quality, I've re-scanned the photographs that got published in my article on developing film and using the new scanner, we will be able to see the difference a good scanner can make to an image, my previous scans can be found on the left with the new scans on the right, feel free to click on the images and flick through to see them enlarged.


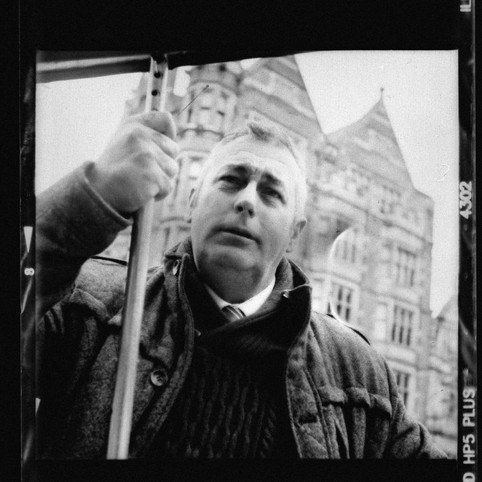

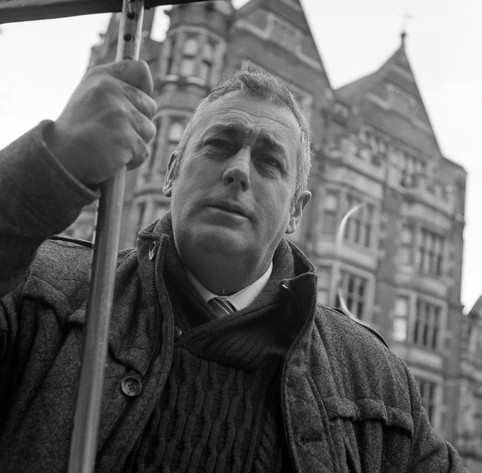


When I compare these scans side by sides, there is a clearly a substantial increase in image sharpness, having the backlight has really helped increase the dynamic range and as well as retain details that would otherwise not be visible in the previous version, a fantastic example of this can be found in the very last set of images with the buildings in the foreground. Colour wise image quality is also really good, although I haven't shot any colour medium format film yet, I have shot a couple of 35mm colour shots. Here are some samples that were shot on a year old roll of Fuji Superia 400 with a DPI at around 4800:


With these colour 35mm samples, everything I've mentioned about the 120 samples in terms of sharpness and dynamic range can be applied to these images. To go further, the colour reproduction and dynamic range that this scanner has produced with these shots is top notch, with the landscape photographs it has managed to bring out the details and colours in the sky with the land being exposed perfectly as well. The colour accuracy is also very good with no signs of over-saturation/vibrancy in any of the frames, which is a good thing - in modern camera technology, sensors have a tendency to make RGB colours look to vivid.
All in all, I am very pleased and proud with the results that this scanner has produced from my negatives, from its frankly ridiculous sharpness with medium format to its fantastic colour reproduction on 35mm colour film. I am looking forward to using it extensively towards this unit and my photography in general.

Comments